This was a little harder then expected, as well Backup Exec (BE) support was not as helpful - they tried but communications was harder then I had hoped. So when I finally got this all working I thought I would share it out. BTW, this is a follow-on from where I did the install / test article on Backup Exec.
I guess I should start with why did I want to do this. I have a CIFS share on my storage appliance and I want to backup my files on it so I could handle data loss or corruption - which happens sometimes when I trip over power cables, or want to test how things work in difficult circumstances.
We need to start in BE. So here we go!
Enable
- Under the yellow icon in the top left corner select Configuration and Settings.
- Now select Backup Exec Settings.
- Now select the Network and Security option. You should see a screen such as below.

- We need to Enable selection of user shares - as seen above.
- You can use the OK button to put this screen away once we have enabled the selection.
Now it is possible to do the type of backup we want to do. Lets prepare a CIFS backup now.
Adding a host
We need to add a host so we can configure a backup of a CIFS share. Important Note - we will require the BE service account, or a different service account to be able to access the CIFS share. Another way to look at this, and what I did, was to configure my BE service account with admin rights at the root of the CIFS share.
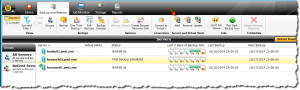
- We start with the task of adding a host from within the Backup and Restore tab.
- We use the Add button as seen below to start the wizard to add a new host to backup.
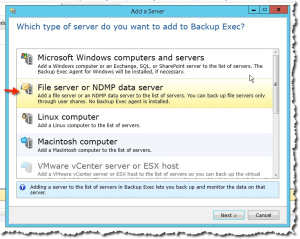
- We select the File server option as seen below.
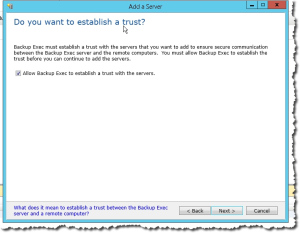
- In the next screen we are asked about trust, and we should select to allow it.
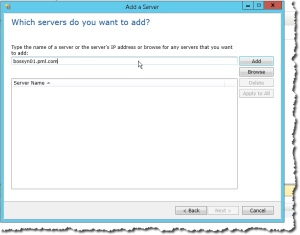
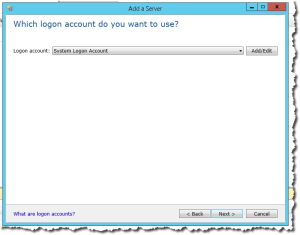
- Next we add our server. This is the CIFS server itself - even if it is a Linux appliance like Synology, or something bigger and more beautiful like a DataGravity appliance, so make sure that the DNS name you enter is for the CIFS server. BTW, when I first tried this I used a Windows server that had shares on it and that never worked for me. So make sure you use the actual CIFS server in this step.
- In the next screen you select the account that actually has access to the CIFS share. It is important to get this right! In my case I used the BE service account and gave it admin access to the root folders in the CIFS share I am going to backup.
- Now we see the summary screen.

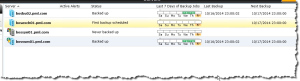
- Once we finish we will see our host is in the list now.
We are ready to configure our backup job now!
Configure backup job
Again we start in BE and in the Backup area.
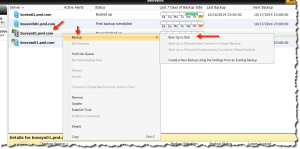
- We <right + click> on the newly defined host, and select Backup, followed by Backup to disk.
- In our next screen we will see the actual CIFS share that is on this host and that our credentials has access to.
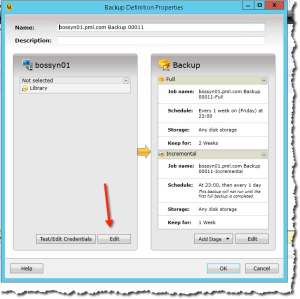
- We need to edit the source so we use the Edit button! We can also edit the schedule and retention of the job in this screen too.
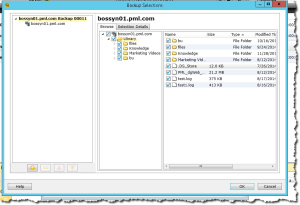
- We can now select what files / folders that we want to backup in the CIFS share. In my case it is everything. So I select OK.
We now have a configured job to backup a host’s CIFSs shares.
Testing your backup
You can use the info in this article on testing your backup with checking logs and doing a restore. But you should know you can work with this backup job like you would any other job - while a little different setup it does handle the same.
Any questions or comments?
Michael
=== END ===

Leave a Reply