Hi there,
I will show you how to install and configure vSphere Replication (VR) for local replication in this article. This is a feature that most VMware customers have and is completely storage agnostic. Meaning you can replication from any type of VMware storage to any storage type. When I was involved with this product before it shipped I tested it first from a VMFS partition that was local to the ESXi host to a different local disk on a different host. So very cool.
I consider VR to be a simple replication tool. It doesn’t have the ability to do consistency groups, or have application consistent replication the way other replication technologies do. But that is OK since you have to pay for those other technologies and you already own VR! I think it is useful for moving virtual machines on or off storage, or to put copies of virtual machines in a different geography. But lets get started.
BTW, this is a long post, and with lots of screenshots, but there is an option to print at the end, and I am trying to get a PDF option in place too. As well, local replication means one virtual center and essentially replicating in your local data center. I will do another article in the future on remote replication.
And again BTW, when our storage array (remember I work for DataGravity) ships it will be 1.0 and so will not have replication. What I am showing here is a good way for you to get replication for your virtual machines on the array when it first ships.
Installation
Prerequisites
You will need to gather at hand the following items.
- VR bits - found here. There is both an ISO and a ZIP file at this link and we will be using the ZIP file.
- FQDN and IP address.
- The docs are found here.
- While we are doing local replication in this article, if you do need port information you can find it here.
- You can only have one VR appliance registered to vC at a time. That appliance can handle a maximum of 500 replications - or put another way - 500 replicated virtual machines.
- You need to make sure that your vC / ESXi versions are supported by VR. This should not be a normal issue but if you have older hosts in your infrastructure you may need to think about this. You can find the compatibility guide here. I upgraded my vC and hosts this morning to vSphere 5.5 U2 so I am good. I did this partly because of the new feature in vSphere Replication of Reports which you will see below.
- Runtime settings must be configured. They are in the vCenter Server Settings. See below for an example.
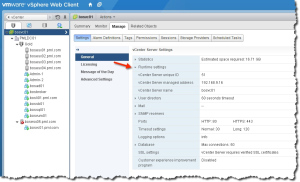
vC Runtime settings
We must use the vSphere Web Client so I assume you have it ready and are familiar with it? In addition you will need to have the Client Integration Plug-in installed so you can deploy a virtual appliance via the vSphere Web Client. If you need this you will be prompted in the bottom left corner of the vSphere Web Client log-in screen.
Once you have the bits downloaded and extracted you will see something like below.
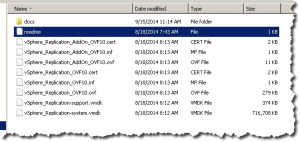
It is important to note that there is two flavors of VR extracted and seen above. The ones that have AddOn in the name are when you need more then one VR appliance. The first is both management and replication but as you replicate more and more virtual machines you may need additional replication resources which means you add another VR appliance. It would have AddOn in the name.
What does what we are going to do look like? Here is a shot from the VR documentation. It is not a perfect diagram as I have only one cluster in my lab currently.
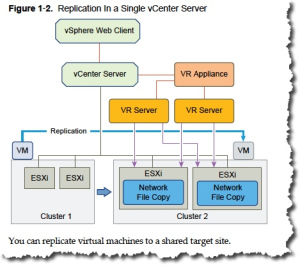
Image from VR documentation
Process - OVF Deployment
We start in the vSphere Web Client.
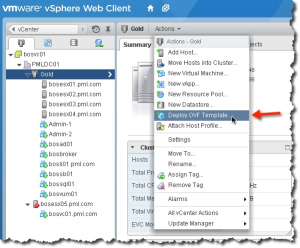
- We need to deploy the VR virtual appliance.
- On the Actions menu select Deploy OVF Template. Yes, that does mean deploy virtual appliance but they use different words then I do.
- Once selected a wizard starts and takes you through the deployment.
- First up is selecting the source file.
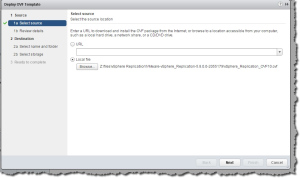
- Again note that I have not selected the file with AddOn in the name.
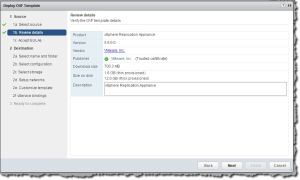
- On the next page we review details - which is not many.
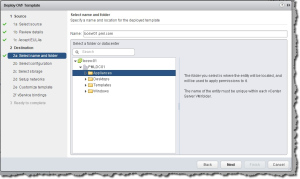
- On the next screen we name the appliance. It is a personal best practice to always name appliances using the FQDN. This is an odd thing as it is based on some issues in the past that may or may not be still realistic. But some habits die hard.
- Next we deal with size of the appliance.
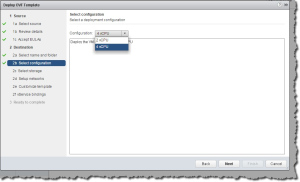
- I selected 2 vCPU as I will be not replicating many VMs at all. However if you are not sure then leave it at 4.
- Now we decide where to store the appliance.

- Now we arrive at networking configuration.
- We first see a screen that suggests we are using DHCP.
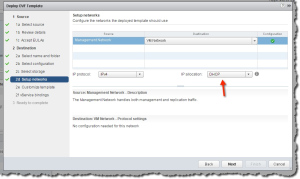
- We need to change that to Static - Manual.
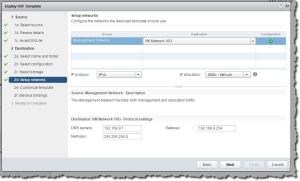
- Once it is configured with the appropriate information we continue. We will do the IP address on the next screen.

- We take care of the root account password and IP address now.
- We deal with the vService bindings next.
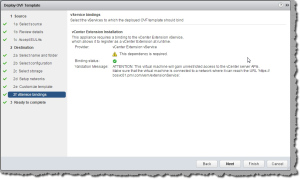
- Note the green check-mark? That is what you need to see. If you don’t revisit the prerequisites above.
- Next we review the settings.
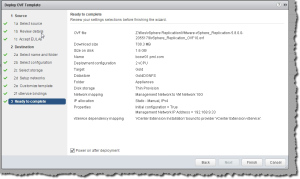
- Note how I have the Power on after deployment checked? A little quicker doing that now.
- Now we wait. We can watch Recent Tasks.
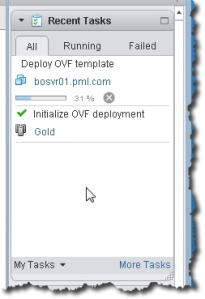
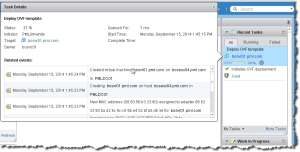
But if you like more info, you can click on the task we are watching.
Once the appliance starts up we have finished with the deploy phase and we need to move to configuration.
Process - OVF Configuration
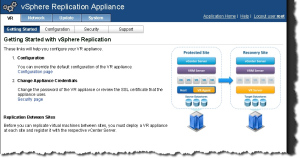
Now we need to configure VR. We do that by working in the VAMI console.
- Connect to https://FQDN:5480
- Log in using the root account and the password you did at deployment.
- You should see something like the below
- Change to the Network page. So lets change to the Network tab, and the Address sub tab.
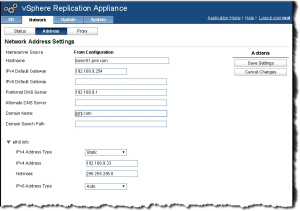
- I add the domain name or any other info if necessary. You will get a note about network changes may require a restart of the web UI. Just ignore - unless you make more significant network changes then I do.
- Now we need to log out of the vSphere Web Client. Once we log in again we should see a new icon.
Seeing that icon means all is good. Now we move on to more interesting things.
Replicating a VM
Now we have our infrastructure done it is time to test it! Lets replicate a virtual machine from it’s current datastore to a new datastore.
- We find a VM that we want to replicate and right click on it.
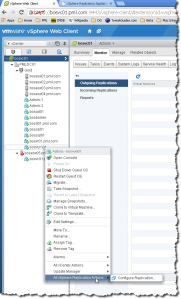
- The Configure Replication option is buried in the All vSphere Replication Actions folder. But once you select it you get a wizard to help you configure the replication.
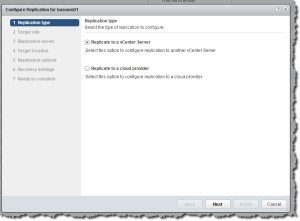
- We see a very new feature here, and an interesting one too in that we can replicate to another vCenter or to a cloud provider. Very cool. We are going to replicate to vCenter.
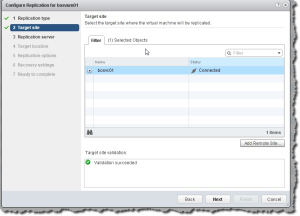
- We have only done local replication so we do not see a remote vCenter, and cannot use the Add Remote Site button. But we can select our own vC.
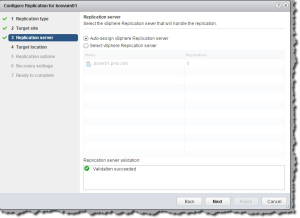
- We now get to select our replication server but it is almost always best to let it select.
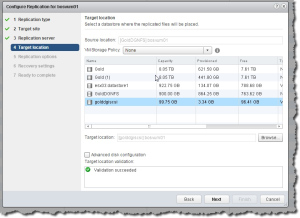
- You need to select the destination datastore. BTW, the Advanced button lets you make a number of decisions such as choosing a different disk format at the destination - such as going from NFS to iSCSI and going from thin to thick.
- Below we will see we have options for the Guest OS quiescing.

- My suggestion is to use no guest quiescing as the norm but when you know you need quiescing you should use it. When you decide you need it - due to open applications - make sure to test the impact of it. There definitely can be an impact. Be aware too that this is only file system type quiescing and not application.
- On our next screen we get to make some interesting decisions.
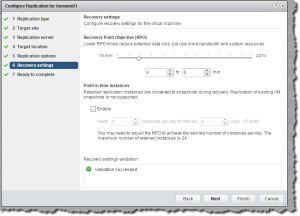
- The first decision on this page is what sort of Recovery Point Object (RPO) do we want. The range is from 15 minutes to 24 hours. Be aware that the lower the number you select the more you will replicate. Can your bandwidth handle that? Especially if you have a number of machines. Aside from the technical question of can your link handle the traffic this is really more of a business questions. How much data can we afford to lose?
- Once decided we can talk about how many point in time instances should we have? It will take more disk space at the destination but you may want to have copies of your VM. For example if you have virus damage, then the most recent replication may be of the infected files. But the replicated instance before that may be clear.
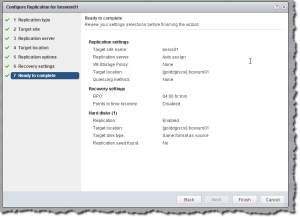
On this last screen of the wizard we only confirm what we have done. Once we select Finish replication may start. I say may as there are a number of variables that can impact exactly when replication starts.
While we have only selected one virtual machine to replicate we can in fact do more if we want. Remember the limit is 500 virtual machines, but we would need to add vSphere Replication Servers to help with that scale.
BTW, here is a screenshot that shows what things looks like when you finish the replication.
Some good info at the bottom of the screen. It is showing what applies to the VM that is highlighted above it. But notice the sync duration? It is the first time so it is longer but it is good to know. The last sync size is also good to know since it and the time can help you with your bandwidth design.
Monitoring your Replication
While my experience is very good with vSphere Replication, and I don’t think there is a lot of administration it needs, it is important to understand how to check it out. So lets see how the replication we just started is going.
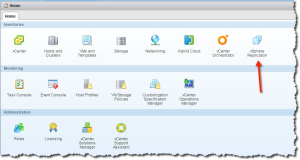
- We can start on the Home page and access the vSphere Replication icon.
- Once we do you will see the screen below.
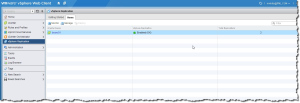
- What we see here is our vC, and the state of our replication. The total replications will increment of course but currently it is pretty low since we just started.
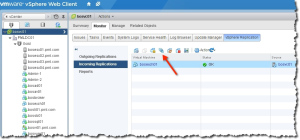
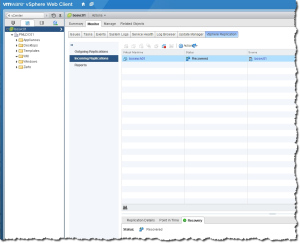
- We also see two icons - Monitor and Manage. Very useful. If we click on Monitor we get the following.
- This screen can also be found by clicking on your vC, and changing to the Monitor tab, and selecting the vSphere Replication tab.
- We see the list of virtual machines replicated and information about it. That is in Outgoing, and we see the same in Incoming since we are replicating within the same environment.
- The Reports option is new, and interesting.
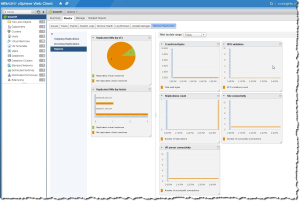
- Lots of good stuff here. This is a key place for monitoring and even some troubleshooting. The connectivity panels give us good info for troubleshooting, but RPO violations is what business owners usually want to see.
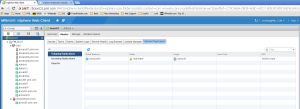
- Incidentally, if we had selected Manage from the vSphere Replication page instead of Monitor we would have ended up here.
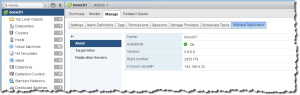
- BTW, this can be found by selecting the vC, followed by selecting Manage, and then selecting vSphere Replication.
- We see version information which is useful, and since we have no target sites configured that view will be empty.
- The Replication Servers view will show any and all replication servers as well as their state.
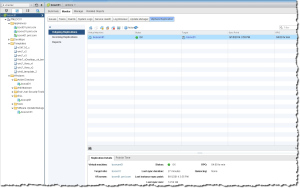
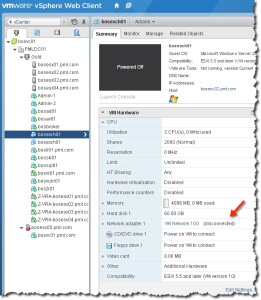
As well, you can always look on the Summary page for a virtual machine that is replicated and you can see information on that replication.
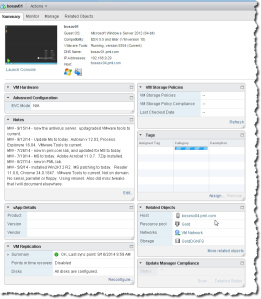
In the image above you can see at the bottom a status of replication widget. Plus sometimes when there is an issue with the replication you will see a message like below.
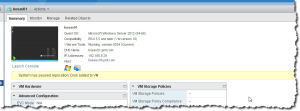
I added an additional disk to this VM so replication was paused to deal with that automatically. Incidentally you will need to re-configure replication - find the link in the status at the bottom of the screen. Just Next Next Next kind of thing.
How do I get a VM back - or test a replication?
If you would like to test the replication, or if you have lost a VM and want to recover it you would do it the same way.
- Select your virtual machine and power it off. Of course if it is gone that is not necessary. But for doing a test that is a good idea.
- Change now to the vC \ Monitor \ vSphere Replication tab and select your VM.
- You will see a view very similar to below.
- The arrow is pointing at a button that has a popup tool tip of Start Recovery. So lets do that.
- When the wizard starts you see the screen below.
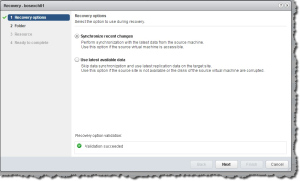
- You should, if you can, Synchronize recent changes, but otherwise select the appropriate option. Where this is very useful is if you are migrating a VM somewhere. By turning it off and then synchronize the recent changes means you remove application consistency worries out of the picture. You get very high quality replication and perfect application consistency!
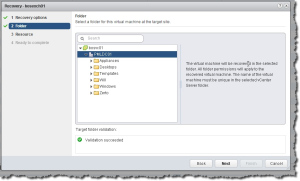
- Pick a location for the VM that you are about to recovery.
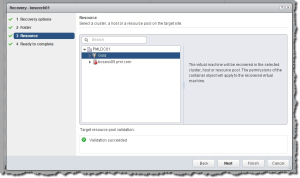
- Now we need to select the resources. And next we look at the summary screen.
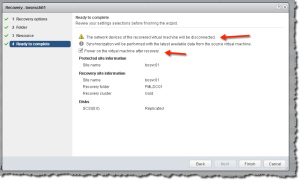
- Aside from a Summary screen it has other information on it. It remind you if you are going to sync or not, but also if you should power up the recovered VM or not. It also lets you know the network devices are NOT connected and that is important to know. It doesn’t take long to recover.
- We can see that the VM has been recovered.
We can see the VM with its network disconnected. We connect the network and power it up and we are done. If like me you just did a test you should delete the destination VM and power back up the original. You will need to recover the replication at that time - stop and redo.
You will also notice that while annotations traveled with the VM, tags did not.
Useful Links
If you want to learn more about understanding bandwidth usage in VR you can with this article. VMware has a lab fling that can help you figure out bandwidth and you can learn about it here.
Conclusion
You have installed, and configured vSphere replication by this point. The OVF install helps to make it easier. You have replicated a virtual machine too and even seen how to check up on it. Plus you have seen how to recover it too!
Remember that this is storage agnostic and you can replicate virtual machines between any storage that VMware supports.
As always, feel free to comment or question - I do love comments. Although I get a lot of strange ones and it was only recently did I learn they are a strange kind of spam.
Update:
- 9/18/14 - I had someone ask - one of my bosses, how to recover a virtual machine you had replicated with VR. So added that in.
- 9/16/14 0926 Added the two screenshots at the end of the Monitoring section. They show another spot to monitor.
Michael
=== END ===

Leave a Reply