Hello all,
This will be an article that helps you get the very nice SolarWind’s Virtualization Manger (heretofore known as VAM) working in your lab. Thanks to Aaron for the license and help! As always this will help you get it working in the best way I know how and I hope to impart info along the way that I find as I work through this.
Hope you find this useful, and while I will repeat it at the end, don’t forget I do like comments and suggestions or questions too!
Michael
Prerequisites
- Bits - found here - you get a 30 day license with your download. You will get a VAM zip file and you should extract it before you start.
- Docs - found here
- IP address, DNS and FQDN - you can use DHCP but for monitoring tools I always suggest and recommend static IP.
- License - I am having issues with my license and the portal right now. So I am going to get this all working on the built-in 30 day trial and then figure out the license and write about it.
I do the following via the vSphere Web Client since I like it - don’t scream or shout at that but I have been using it for a long time - but things will work fine with the C# client.
Deploy
This section is about deploying an OVA. Most of you know how to do it but I still have the info and screenshots for you here just in case. Make sure you have extracted your VAM download, as well as have your IP information ready.
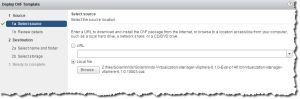
- We use the Deploy OVF Template from the Actions menu.

- This will start a wizard.
- If you forgot to extract your file you will not be able to find the .ova.
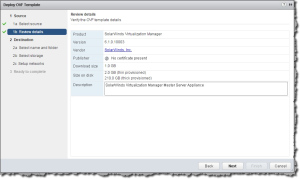
- Nice confirmation of what you are installing.
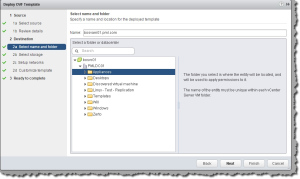
- Use the FQDN you already have ready, and pick the right folder.
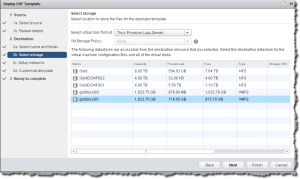
- Make sure you have the right disk selected.
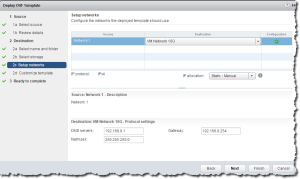

- Networking is pretty simple. BTW, the manual says you need to do networking in the console but I did not have to do that.
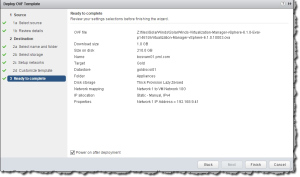
- So let the application start up after the install. Once it has started up, you can access it at: https://FQDN:5480
We are now ready to move to the next step. After all we have our appliance running now.
VAMI basic config
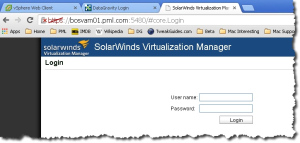
We need to make a few simple tweaks so we need to log into the VAMI appliance using the account password combo of admin / admin.
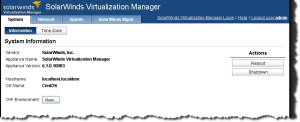
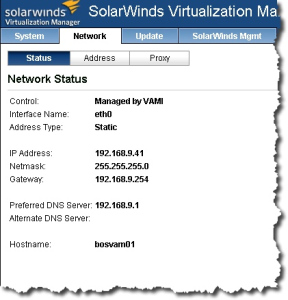
- As you can see the hostname is not correct.
- Lets change to the Network tab. We are going to change the hostname to match our FQDN. You can do this on the Address page.
- So we have the right hostname now. Lets move to the the SolarWinds Mgmt tab so we can change the admin account password.
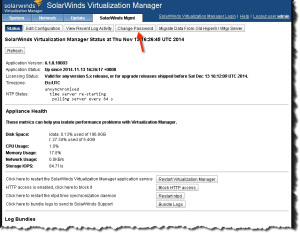
- This will change the password for the admin account that works on the console. It will not change the password for the admin account that works in the UI. We will fix that later.
- On the same page - we see near the bottom of the screen an option to block HTTP access.
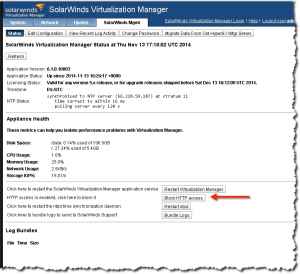
- Lets push that button so that users will have to use HTTPS to connect to VAM.
We now have an installed appliance with a basic VAMI config.
Basic Config
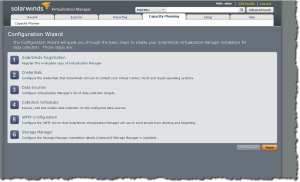
OK, now we need to do some application configuration. SolarWinds has done a nice job with a wizard. So lets log into the app and work our way through the wizard. You will likely be automatically logged in using the default admin / admin credentials.
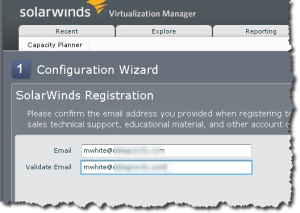
- First step is to do the registration - meaning use the same email account that you have logged into the Customer Portal.
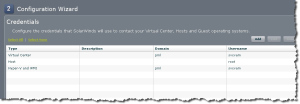
- The next step is to add credentials. This is a little confusing. vCenter is easy enough, but also make sure you do your root account for the ESXi hosts. As well, use a Windows account that can log into any of your Windows boxes. It will be in the Hyper-V and WMI field. Even with no Hyper-V you see what mine shows below.
- With credentials done we move to the next screen which is Data Sources. This is the vC, hosts, etc. that you manage.
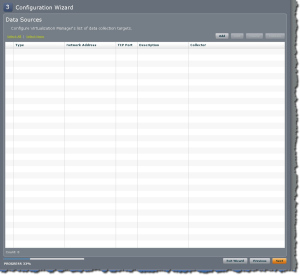
- You should add your vC, and I did not add any hosts since when I tried that they showed as unmanaged and mine are in fact managed by vC.
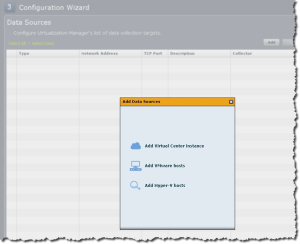
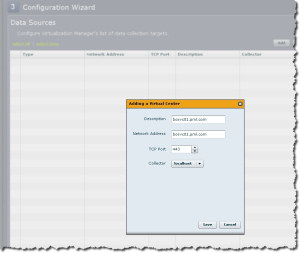
- Small lab here so we are not doing any special collectors, so we leave the Collector at localhost.
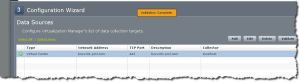
- Note the green check-mark? That happened after I used the Validate button. You should do that too!
- On the next tab we enable our collection schedules.
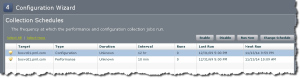
- Aside from Enable, and maybe Run Now, you should not make any changes here until you have run the product and determined what needs to be changed.
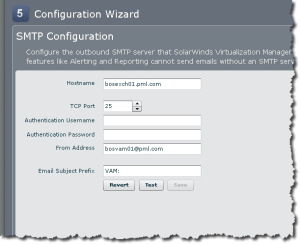
- On the next screen you need to configure your SMTP settings. Alerting and reports will want to use SMTP.
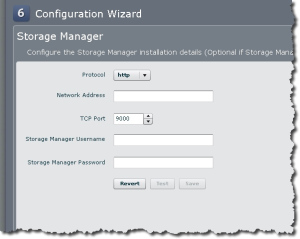
- Next we configure our connection to Storage Manager. Which I have not installed yet but will soon.
- Now we are complete and you will see the following screen now.
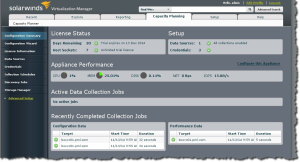
Because I did the Run Now when I was configuring the schedules I can see a little more info in this screen and that helps to confirm things are working.
Advanced Config
We are ready to continue with a little advanced configuration.
Admin Password Change
We changed the console admin account password already but now we need to change the UI admin password. It is not hard but look in the top right corner for the Edit Profile button.
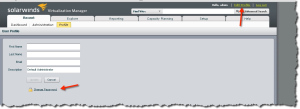
- Definitely change your password here to something complex.
- It is worth adding an email address just in case.
Active Directory setup
Like many customers I use AD in my lab and I like connecting it with any and all apps I can to make my life a littler easier but also enforce better password rules too.
We have just changed the admin password so lets log in again using the new admin password to make sure it works.
Considering this is our first login for real, and how long the appliance has been installed it is an interesting screen!
But lets get AD accounts working.
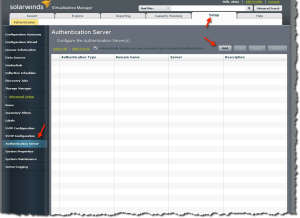
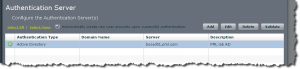
- Change to the Setup tab, and expand the Advanced Setup.
- We need to change to the Authentication Server area, and use the Add button.
- Note that at the top of the screen there is a checked box that says - Automatically create new user accounts upon successful authentication. This means when we are done that anyone in your domain will be able to log in, and become a user. This is not necessary bad but it could be. I would suggest you leave it as it is, and get you and your co-workers to log in and get accounts made, then de-select that box.
- Use the Add button and fill in the dialog with your AD info. See mine below.
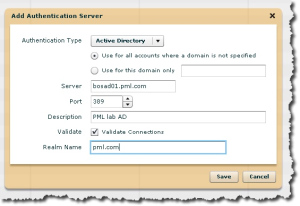
- This is a little different of an AD configuration screen. It should have a group type choice so you could easily limit logon to a specific AD group. But it works.
- Once you save you see a screen like below.
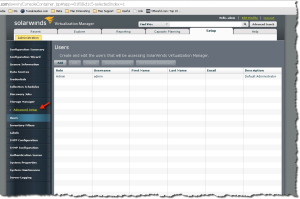
- Now when you log in using your AD credentials you will have user access. So do that now and then log out and log back in as admin.
- You will be shown in the User list now and you should edit your account and make it Admin. See below for mine.
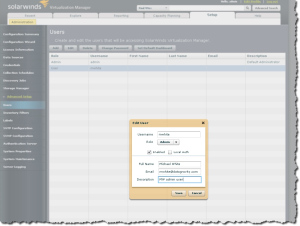
- The email info is important for alerts and reports.
We now have AD integration working so that is good.
We do not need to do much other Advanced Setup now since we have already done the SMTP server setup.
Cool things to look at!
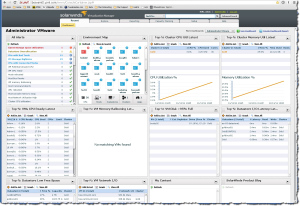
I am quite new to SolarWinds - in particular to this tool. But look at what I can find in the default dashboard:
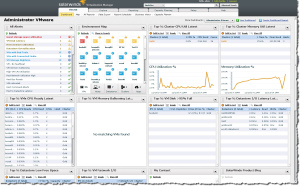
- There is a lot of info on this screen. Top-N of datastore I/O Latency (bottom right), or Top-N VM disk > 95% fill beside it. All useful info.
- I love the top right corner widget of the Alerts. But what happens when I click on the only red one?
- Now we get more info on that particular alarm, including past activity. And a recommendation of what to do. Sort of handy and I have only had this installed for a short time too.
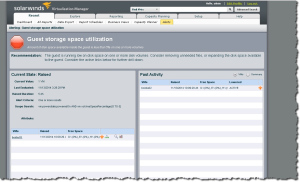
- Another dashboard - a standard one too - is all about storage.
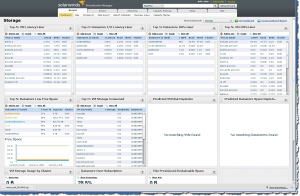
- Pretty interesting stuff - right?
Summary
So we have Virtualization Manager installed and running. And it has found some interesting things - like my backup server is running out of disk. I hope you found this useful.
I have some related articles in the works - including one on Storage Management, one on patching VAM, and one on Licensing it too!
Questions / comments / suggestions welcome!
Michael
=== END ===

Michael - nice write-up as always. Seems much more intuitive and easier to use to see exactly whats happening in your farm than other products which are easy to get lost in.
Thanks for the write-up
Tom
Hi Tom, thanks very much. I agree. It took me longer due to screenshots and freezing cold outside, but an install could be less then an hour and have useful stuff right away. What I miss compared to vC Ops is the Health widget in vSphere Web Client. I have mentioned that to SolarWinds.
Thanks again,
Michael