Hello again, it is great to back here again with you so quick. I have a lot of stuff lined up and I do like sharing it! Another tool from SolarWinds that I think can help, but one I really don’t know much about yet, is Storage Manager. So we are going to learn today! This article will help you get Storage Manager working, and I will share what happens as you work through the install and configure process.
Architecture
Storage Manager is a client server application. The server collects data from agents / traps or even polling and adds the information collected to a centralized database. A web UI is used to access this information. The server also allows the admin user to manage the agents and proxy agents remotely which is most excellent.
The agents provide the framework to gather storage and server performance and file analysis information from remote devices and transmits it to the Storage Manager server. Proxy agents are not installed on the monitored device but can in fact communicate with it for the purpose of receiving the necessary information.
Storage Manager can collect most data remotely from things like storage arrays, VMware hosts and virtual machines, fiber switches, and databases. For physical servers there needs to be an agent. Some of the communication methods includes: SMI-S, Telnet, SSH, SNMP, CIFS/NFS, QPI, WMI, SQL queries, Web Services, command lines and even log parsing.
Primary communications between server and agents occurs on port 4319 TCP via HTTP and port 162 UDP via SNMP.
Prerequisites
- Bits - found here - don’t forget to extract them. You will need an account to access them. SolarWinds does have a nice portal though which is pretty handy.
- Docs - found here
- Release Notes - here
- Agents - found here
- Default admin password is blank, and default db password is solarwinds.
- Port Info - HTTP port 9000 for UI access to server, HTTP port 4319 between server and agents.
- License - I don’t have mine yet so I am getting this going with the 30 day built in trial and will do licensing later. Turns out licensing is pretty darn easy.
- Service account which is AD domain user to connect to vCenter (and in vC should be admin.
- Service account which is in Storage Manager that can be used in Virtualization Manager to connect to Storage Manager. I used an admin level (in Storage Manager) service account.
- Windows 2012 R2 virtual (or physical) with at least 2x vCPU, 8 GB of memory and a 60 GB drive. All of these should be larger if you are doing more then a lab or small company. Windows is not required just what I am using. It does have Anti-Virus (Trend) and is MS patched to today.
Setup
Once you have your all of your prerequisites ready we can proceed. When you extract the files you should see something like below.
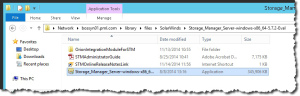
Note the link to the release notes, and the admin guide? Nice they are part of the archive.
But lets get started.
- Connect to your VM.
- Access the install file.
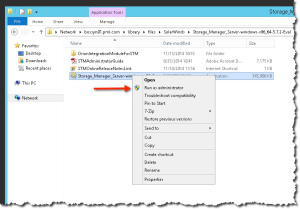
- I used Run as Admin.
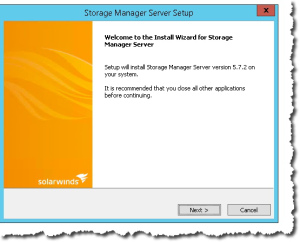
- And the wizard starts.
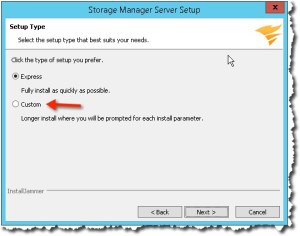
- And just because I can, and I do like to see more during an install, we are going to do the custom. We don’t need to, but we want too!
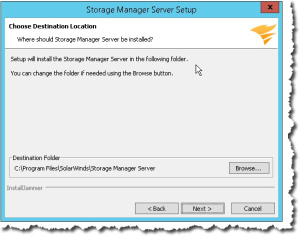
- In the past I always installed apps to Drive G, and left Drive C alone. But it never really worked that way. So many things copied to Drive C no matter what. Plus, the real reason we used to do that is it was hard (or almost impossible at one time) to expand Drive C and that is certainly not true any longer. So Drive C it is.
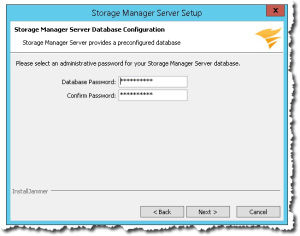
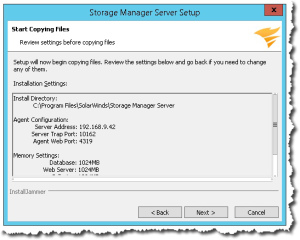
- Next we see a prompt about database password. It appears to be pre-filled in so I am leaving as it is.
- In the next screen we see the config for an agent that will be installed as part of the Storage Manager install.
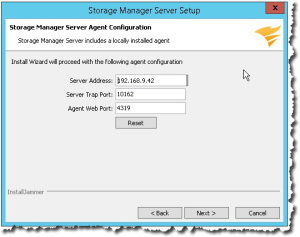
- Again, I would not normally change anything here. I like to get the app going and in use before I make some config changes like this sort of thing. Or, if you already know of a port conflict this is the time to avoid it.
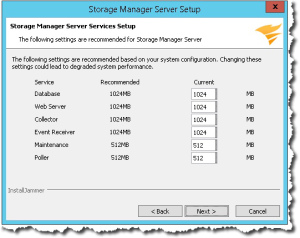
- These memory settings are the result of my VM’s configuration. If you are using more memory then I, your settings will likely differ.
- We next see the typical settings review.
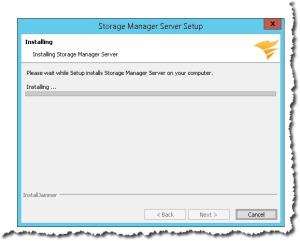
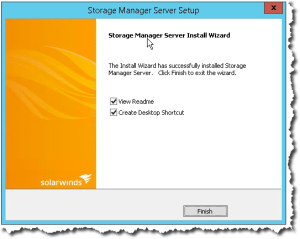
So we are done with the install of the product now. But when we hit Finish we see this:
So this sort of confirms the product is running.
Configure
If you are following this in a linear fashion you have reached the same spot as I. Lets continue from above.
Note: I wanted to work from my normal desktop and not be working on the SM server console - which I think of as a best practice but I could not connect. The URL is http://SM_FQDN:9000 and of course the reason was the Windows Firewall. On the SM server I opened an incoming rule for 9000 and we were good. I did not connect it to the app as I often have troubles with that.
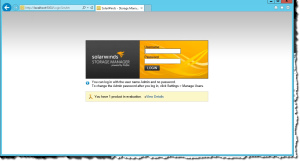
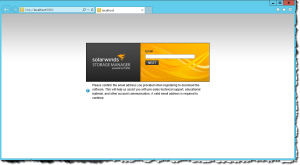
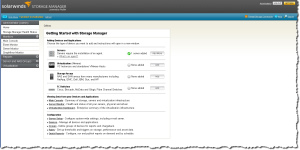
- We can log in as admin with no password. The first look is:
Change Admin password
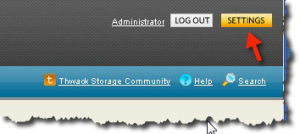
- Our first config change is to change the admin password.
- We use the Settings button in the top right corner of the UI.
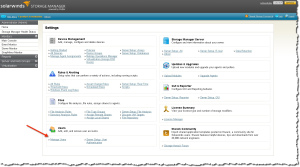
- Followed by Manage Users.
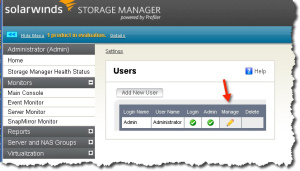
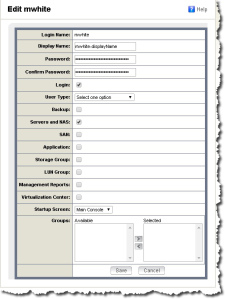
- Now we can use the Pencil as seen above.
- After we use the pencil we will see the following screen.
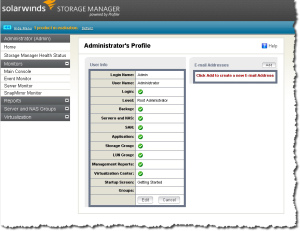
- We use the Edit button - and also smile at the granularity that is possible.
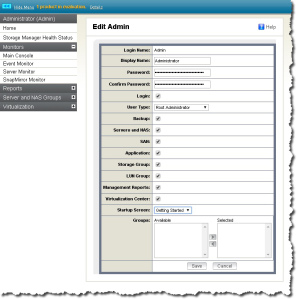
- We can type into the password field - twice the new password and use the Save button to save our changes.
- Notice how we can change the startup screen here?
- I think we have also seen what we need to see to create a user too right? If we wanted users that were outside AD that is.
We have our Admin user working with a better password now and you have seen a bit of the user side of the product.
Active Directory Integration
I do like the ability to use my AD account everywhere. In Storage Manager they do support AD but through LDAP.
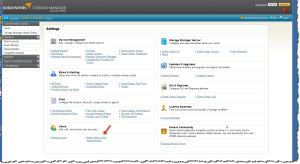
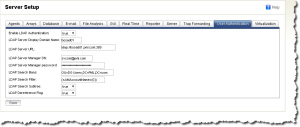
- So we go into Settings again.
- At the bottom of the screen is the Server Setup: User Authentication option. Once you access it you will be at the screen to fill in your LDAP information. See below what it looks like with my info.
- Once this is saved you should log out, and log in as yourself and an account should be created for you. You will not see much.
- Now log out and log back in as the Admin so you can configure your account. Once logged in select Settings from the top right screen corner, and follow that by selecting Manage Users from the bottom left screen corner. You should now see a list of users including the user you logged in as.
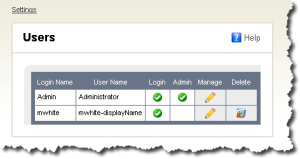
- You can use the Pencil icon to edit the new user.
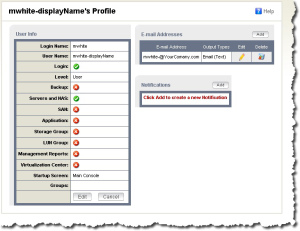
- You can use the Edit button to change the settings of the user.
- Tweak the display name and enable the other functionality as necessary. Do not tweak the password at all.
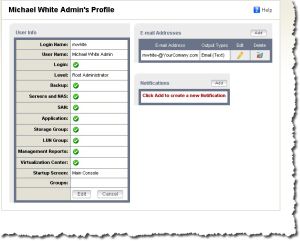
- Now when you add log in you should see something different - like below.
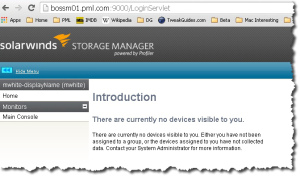
You now have a new admin user. You can use the same method to create other users and it is not hard to provide granular access to the resources. BTW, you don’t see much info in the UI yet as we have not connected anything to it yet.
Configure Virtual Center Access
You will start by logging in as admin. This is where you will use the service account that is a vCenter admin level account.
- Once logged in you will see the following screen.
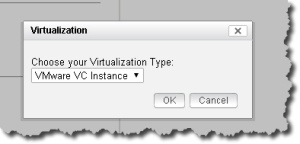
- Use the Add button seen in the Virtualization row. You will see something like below. You may need to change the dropdown to show VMware VC Instance.
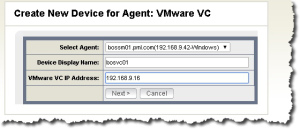
- You will now need to configure the connections to your vC.
- Now you get to the Configure Device screen. I suggest to NOT look at the advanced settings.
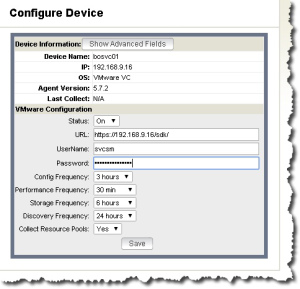
- You can see my service account for Storage Manger to use with vCenter in the screenshot. Make sure it has the Admin rights in vCenter. I did not make any other changes (other then adding the password).
- This was not enough to get interesting information to be visible in the appropriate screens.
- So now you need to visit Settings - top right corner.
- Now look for Manage Agent Assignments and select it. It is in the Device Management area. Once selected you will see something like below.
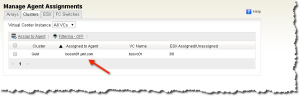
- When I first accessed this screen the field where the arrow is pointing was empty. Since we currently only have one agent it was easy to pick it and use the Assign to Agent button. Once that was done it will look like above.
- Now if you change to the Virtualization \ Virtualization Dashboard screen you will see something a little more interesting.
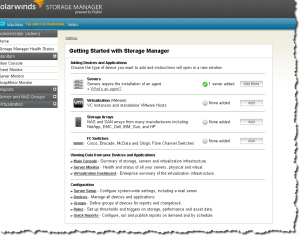
You now have Storage Manger installed, with basic functionality configured and connected to VMware. There is really a lot of information available now!
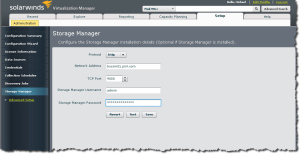
Connecting Virtualization Manager and Storage Manager
It is very handy to have these two tools talking. Not hard to do. You need to be working in Virtualization Manager as an admin.
Now change to the Setup Tab, then change to the Storage Manager page.
- Once you have Test, and Saved, you are done.
You are now complete with connecting the two applications.
SMTP Setup
I consider this part of the basic setup so that reports or alerts - when you need or enable them can actually be sent out.
You start at Settings. Then select Server Setup: E-mail in the Storage Manager Server section. See the arrows below?

Once you select the Server Setup: E-mail option you will see the following screen. I have filled it in already.
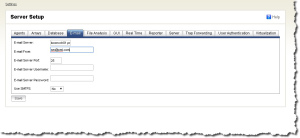
Once it is filled in you should hit Save. There is no test button which is quite surprising.
Storage Configuration
I do not have any supported storage or network switches. But in short you would need a service account, and a connection to the equipment as well as assign an agent to do the monitoring. As soon as I find some storage or networking gear that is compatible I will fill in this section - or maybe do new article(s).
Supported Storage
I am impressed with the amount of storage that this product supports. Check out this list:
Dell™ EqualLogic™
Dell PowerVault MD3000i
Dell Compellent
EMC Celerra ®
EMC CLARiiON ® , VNX
EMC Isilon™
EMC Symmetrix DMX ,VMAX™
Hitachi Data Systems ™
HP 3PAR
HP StorageWorks EVA
HP LeftHand P4000
HP StorageWorks XP
IBM® System Storage DS® 3xxx, 4xxx, 5xxx, 6xxx, 8xxx
IBM System Storage™ N series
IBMSystem Storage™ SANVolume Controller (SVC)
IBM V7000
NetApp®
LSI™
ONStor™
Pillar
SGI
Actually this list is missing storage I know it supports so it is an even more impressive list. Pretty good coverage I think. And yes, they cover off a lot of other things like Linux, VMware, and Cisco / Brocade / McData / qLogic switches and more.
Cool Stuff
There is a number of things in Storage Manager we can consider cool - even without it directly talking to a storage array.
Here are some interesting screens. This is with no networking or storage connected to Storage Manager and only vCenter talking to it. So pretty cool!
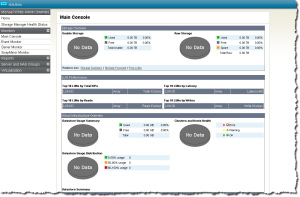
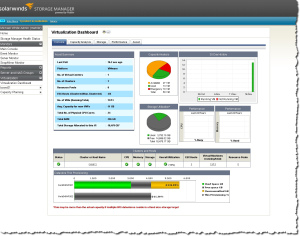
This one is the Home Screen which is showing the Main Console. This is slightly scrolled down from the top which is showing LUN type info.
I really like the Server and VM Health Overview, as well as the Top 10 Storage / CPU charts.
In this next one that is Server Monitor from the Monitors section we see a list of the servers and information about each of them. Where you see the red icons you can click for more information too.
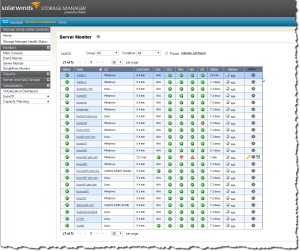
What a great little snapshot of health and info.
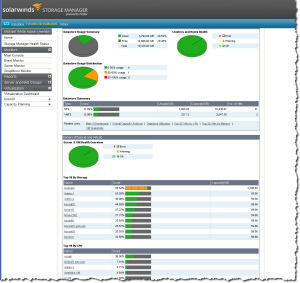
In the next one I select the Virtualization section and my vCenter.
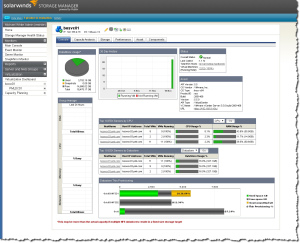
Notice the DataStore usage - Status - Asset info? Plus with more time some of these things will build out more but lots of interesting stuff here. I like how it shows the thin provisioning information too.
There is a lot more screens that I would like to share. There is a lot of cool stuff here!
There is some very interesting possibilities for file analysis with this product for things like duplicates, or types but I do not have storage for it, and I do not have the knowledge yet for it. But it sure looks interesting!
Summary
Thanks for checking out this article. We have Storage Manager installed, configured and connected to vCenter and we get a lot of information out of that. I cannot wait to find some compatible hardware to connect in and get even more information!
I think it is an interesting product and I do like how it works with Virtualization Manager as well.
Michael
=== END ===

Leave a Reply